Once every few generations there is an event, a moment, that changes everything for ever. There have been two in my lifetime. The first was when JFK was assassinated. That happened on my 4th birthday and I have absolutely no recollection of it. But I was reminded of it every year on my birthday.
The second occurred 9 years ago today.
I was still living in Los Angeles and I worked about 3 blocks south from LAX. The runway closest to us was the longer south runway that when you are driving on Sepulveda Blvd, you drive under the south runway and right past the end of the north runway. I always drove on Sepulveda to and from work.
That day I arrived at work at 5:30am and started my usual routine of booting up my computer, checking my email, and then a quick visit to some news related websites. I went to MSNBC's website first and saw the breaking news about a small plane crashing into the World Trade Center.
Since we had a television in the conference room down the hall (I worked for a cable television provider at the time), I went and turned the television on and tuned to MSNBC. With the exception of one other person, I was the only one there at the time.
I remember looking at the images on the screen and not really listening to what they were saying. I was thinking to myself, look at the clear skies, there is no way that was an accident. Then I looked at the damage and thought, there is no way that was a small plane.
Then comes the second plane. I was stunned. My mouth dropped open. It amazed me that the talking heads kept saying a small private plane because it was obvious to me that it was at least a 737 if not bigger.
More people were arriving at work and we all gathered there watching the TV, all of us just shocked. I called my father, then my mother, then one of my brothers.
For me even after all that, the moment when it really hit home was when they shut the airports down and all the planes at LAX went silent. I never realized how loud it was, the constant roars from jets taking off and landing until they weren't there anymore. That made it so real.
Later when it was revealed which flights were involved, American Airlines Flight 11 and Untied Flight 175, I felt sick to my stomach. See, I have flown on both those flight quite a few times coming home from seeing my family in Boston and New Hampshire. When I was packing my stuff in the months ahead, I found one of my boarding pass stubs for AA Flight 11. I still have it. It reminds me of how much life can be a chance.
People have so often would bring up who is to blame for this tragedy. Some would blame the Republicans and Bush, some would blame Clinton. But the ones who were to blame for this are the ones who did it, the hijackers and Al Quaeda.
One of my favorite miniseries is From the Earth to the Moon and in the first episode which dealt with the fire that destroyed Apollo 1 and the crew. They were asked by Congress to find out what happened and who or what was to blame. At then end, the guy investigating it told them that the reason it happened was that no one imagined the scenario that did happen. A lack of imagination. I have read some people (a very few) blame the passengers for not fighting back when their flights were hijacked. But why should they? In the past, you were hijacked, flown somewhere and negotiations commenced. We never imagined that someone would fly those planes into buildings.
But back to the title of this post. Recently I discovered a website that has archived television footage from September 11, 2001 as well as the following days (http://www.archive.org/details/sept_11_tv_archive). I watched some of it. It is in approximately 40 minute increments. The first ones beginning at 8:31am-9:12am. I watch the typical fluff they were airing until the news broke and it was like someone drew a line in time, before we were lighthearted and after, so much fear.
Everything changed and it was just a moment in time.
Friday, September 10, 2010
Tuesday, August 17, 2010
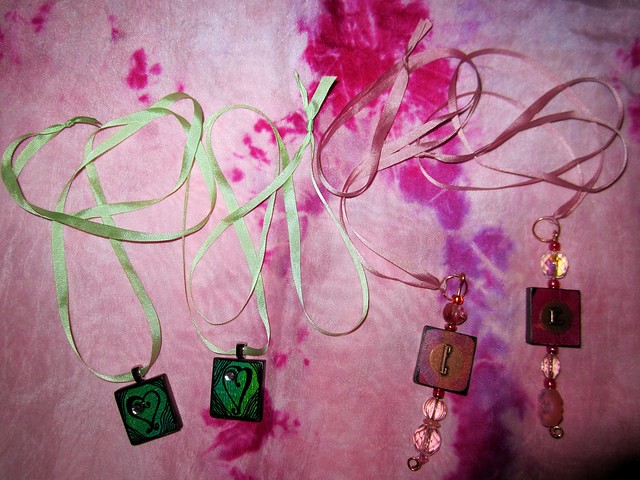
Altered Scrabble Tile Pendants
My next swap I participated in was for sending 2 altered scrabble tiles each to two partners. I opted to make pendants. As with everything, I have a ton of scrabble tiles. So off to the work room. As with the dominoes, I drilled holes in the top and bottom with my handy dandy Dremel with a very small drill bit. Then for the others, I opted to use bails for them.
I sanded the front so that what I glued on there would stay. Instead of using paper for the front which would require some form of sealant, I decided to use something I created myself. I used Yupo paper which is 100% synthetic recycled "paper". You can get some really cool effects with watered down paint. I chose to brayer the paint on it and I have a big pile of these cut into ATC sized pieces. I used a piece of cardboard to evenly spread some heavy matte gel and pressed the front of the scrabble tiles into this and let it dry.
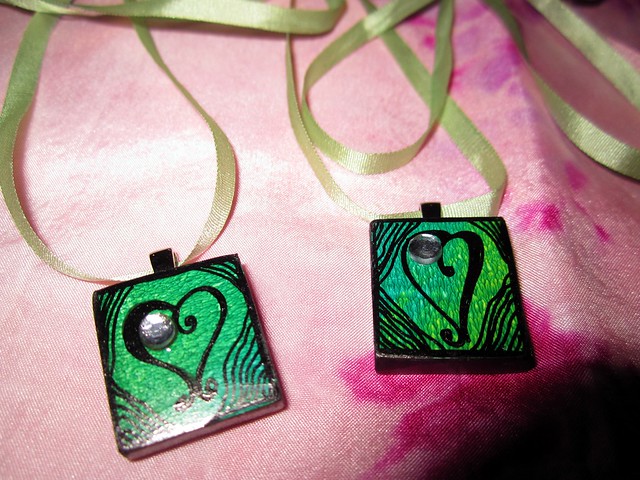
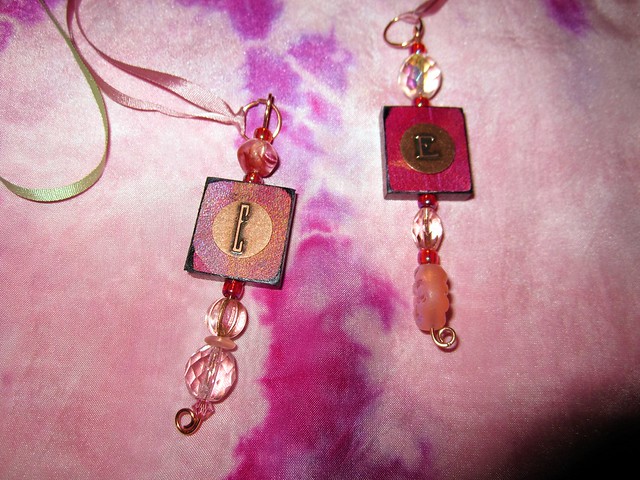
I trimmed the excess Yupo paer from the tiles and colored the sides with a black Sharpie pen. I then on one set adhered a copper disk with a letter imprinted on it on one set and on the other I drew with a Radiograph pen a heart and glued on a Swarovski crystal. I added beads and ribbon for the former and silver bails for the latter. And here are the results!


I sanded the front so that what I glued on there would stay. Instead of using paper for the front which would require some form of sealant, I decided to use something I created myself. I used Yupo paper which is 100% synthetic recycled "paper". You can get some really cool effects with watered down paint. I chose to brayer the paint on it and I have a big pile of these cut into ATC sized pieces. I used a piece of cardboard to evenly spread some heavy matte gel and pressed the front of the scrabble tiles into this and let it dry.
I trimmed the excess Yupo paer from the tiles and colored the sides with a black Sharpie pen. I then on one set adhered a copper disk with a letter imprinted on it on one set and on the other I drew with a Radiograph pen a heart and glued on a Swarovski crystal. I added beads and ribbon for the former and silver bails for the latter. And here are the results!
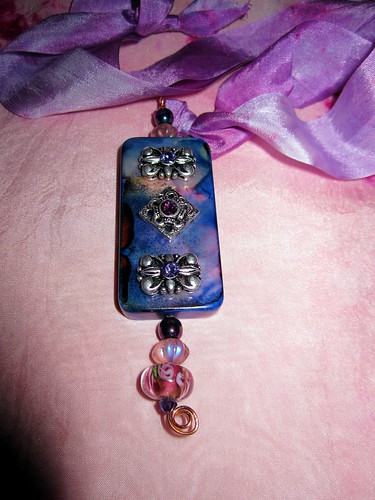
Altered Domino Pendant
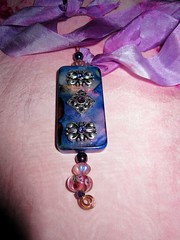
I participated recently in a swap to alter a domino into a pendant. This is what I made:

I took a plain old domino and I began by drilling a hole at the top and the bottom to insert copper wire. But before I inserted the wire, I colored it with alcohol inks using both Pinata and Adirondack Alcohol Inks. The Pinata colors are very vibrant while the Adirondack Inks are more subtle.
After the inks dried (which is very fast) I used E6000 glue to glue in a copper wire at the top and bottom. I let that dry. Once dry I put beads on the wire and at the top created a loop for the silk ribbon and at the bottom I created a spiral to hold the beads on.
I then glued on the findings on the front which have Swarovski crystal bead inserts.
While the glue was drying, I dyed the silk ribbon with Imperial Purple and Lilac dyes.
I added a copper jump ring and then added the ribbon and I was done.
I hope you like the result.
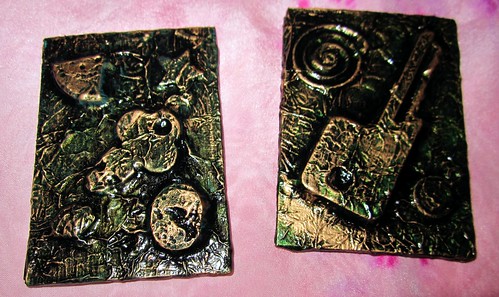
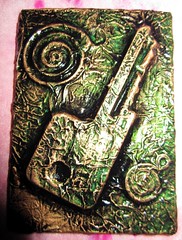
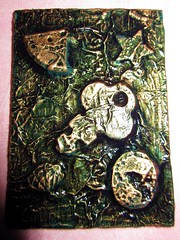
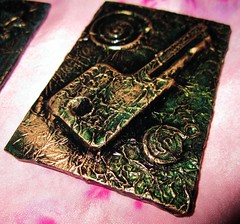
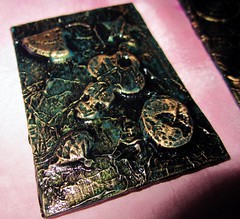
Formica Sample Tiles Not Just For Remodeling
A few years ago, I discovered that you could get free samples of formica at Lowes and Home Depot. I loved these and I knew I could make something of them. So I drove to different stores and collected some at each one (I didn't want to be too greedy at any one store). I had see what I could do with these and after a few failed attempts at projects I had seen on The Carol Duvall Show, I decided to step back from it for a while. Then I had to start packing up everything because at that time we were living in Florida and after two years of hurricanes, we had damage that had to be repaired and my husband was being moved here to South Carolina for his job.
So all my supplies were packed up. We finally moved and now 5 years later I was flipping through youtube videos on art projects and I found this video http://www.youtube.com/watch?v=a59mFa-l064&playnext=1&videos=JoR0x_L1spU by RachelO113. I thought this was so cool and when I find some new technique, I have to try it right out. So I went out to the studio and was looking for things to use and I came across my cache of these formica samples and a light bulb went off in my head, "I'll use these!"
So I ended up making a couple of magnets, but because the formica samples have holes in the top, you could easily make them into pendants also. Here are the results of my first try, with more to come:


I highly recommend this foil art technique, let me know what you think.
So all my supplies were packed up. We finally moved and now 5 years later I was flipping through youtube videos on art projects and I found this video http://www.youtube.com/watch?v=a59mFa-l064&playnext=1&videos=JoR0x_L1spU by RachelO113. I thought this was so cool and when I find some new technique, I have to try it right out. So I went out to the studio and was looking for things to use and I came across my cache of these formica samples and a light bulb went off in my head, "I'll use these!"
So I ended up making a couple of magnets, but because the formica samples have holes in the top, you could easily make them into pendants also. Here are the results of my first try, with more to come:
I highly recommend this foil art technique, let me know what you think.
Monday, August 9, 2010
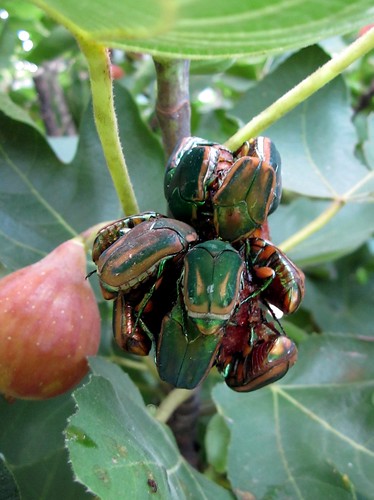
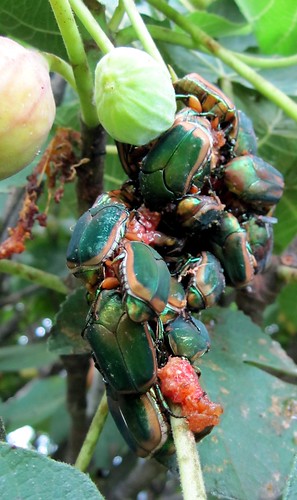
June Bugs
We have had a really dry summer, from June until the last week of July almost no rain. So this year the annual June Bug invasion had not yet occurred. I hadn't seen Japanese Beetles or heard hardly any Cicadas. Since they all emerge from the ground it is probably because the ground is like fired terra cotta LOL. Then the last week of July we had some decent rain and all hell broke loose. Thousands of June Bugs everywhere. Today I went out to take some photos and I went to the fig trees to try and get some close ups of the wasps and bees and the June Bugs were covering the overly ripe figs. I had never seen so many in the same place at once. Check the photos out:


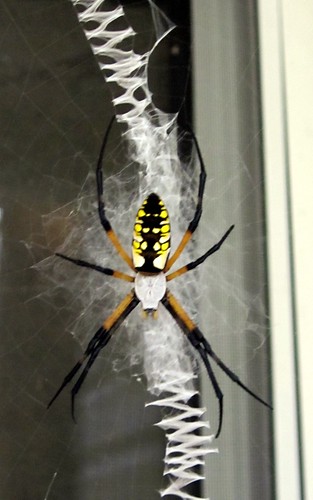
Amazing. Then going in the house I saw a Golden Orb Spider, it was huge and beautiful (I hate spiders, but I can appreciate a beauty like this one)

I have never in my life seen as many bugs as we have here, not even in South Florida. Wow.
Amazing. Then going in the house I saw a Golden Orb Spider, it was huge and beautiful (I hate spiders, but I can appreciate a beauty like this one)
I have never in my life seen as many bugs as we have here, not even in South Florida. Wow.
Friday, August 6, 2010
Making Your Own Background Papers
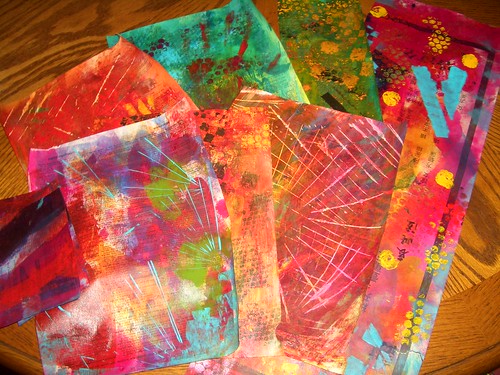
I love buying papers. It is easy and not too expensive, but it isn't original or even your own art. So one day while I was looking up tutorials on youtube, I came across this inchie tutorial http://www.youtube.com/watch?v=GCX8BTadbLY . I really thought this was cool so out I go to mu studio to make some of my own. These are some of the results:
 So I thought I would show step by step how I made them and then show an example of something I made from it. The pages in and of themselves look like a mess, but when cut down and used as a background, they are quite interesting. And each item created is unique. If you really like what you made and want to use it in multiple projects, just take it down to Kinkos and make color copies of it for future use.
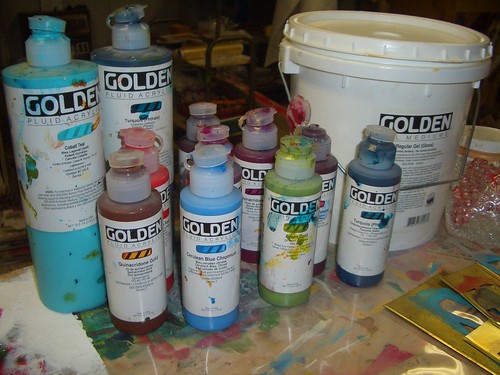
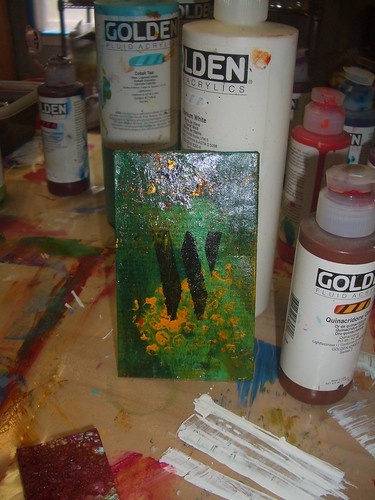
Step1: Gather your paints. I use Golden's Fluid and Heavy Body Acrylic paints.
 I really like the richness of Golden's Acrylics. My favorite color is Quinachridone Gold, it has such a warm glow to it. I like to use it as a finishing glaze to my work, it brings the colors all together.
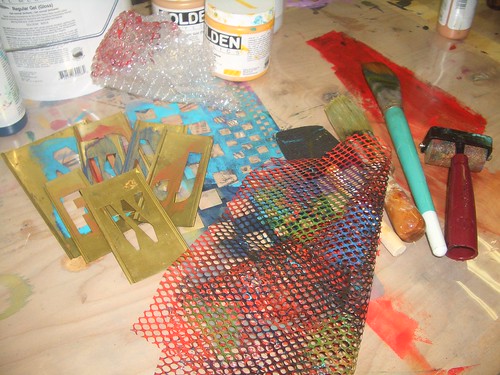
Step 2: Gather your stencils and other things.

I have a great set of brass stencils I bought as a lot on eBay, there are over 300 pieces. I love using bubble wrap and whatever else I can find that will give me unique markings. I apply the paint with a brayer, it makes such wonderful and deep layers.
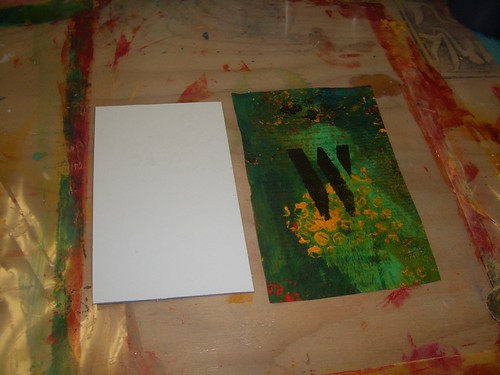
Step 3: Gather your papers for a base.

I have all sorts of papers like newspapers, I especially like foreign ones (the one in the photo is an Asian paper I bought in Chinatown in Los Angeles), dictionary pages and some Asian papers I bought in Los Angeles.
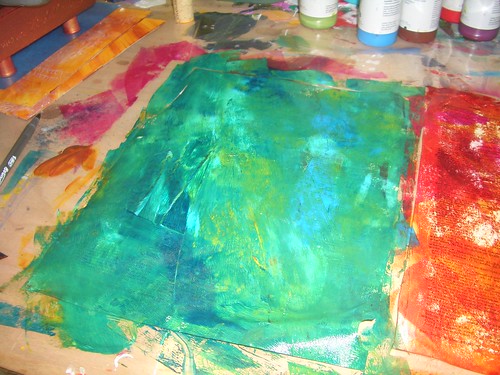
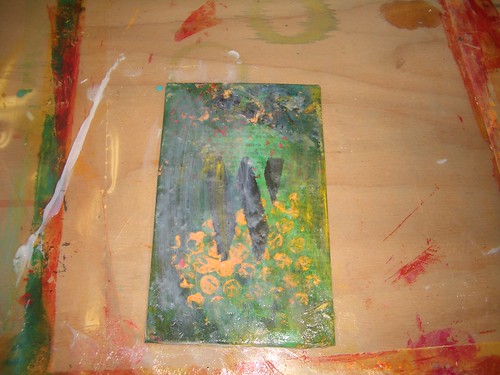
Step 4: Layer your paint onto your paper base.

Sometimes I dribble the paint on one at a time brayering in between colors and other times I dribble all the colors on and brayer them all at once. The one thing is that when you dribble it all at once, you tend to get a very thick layer of paint so I will put another piece of paper on top and pull it up and it gives you such cool patterns and a neat base for a second piece. (see example below)
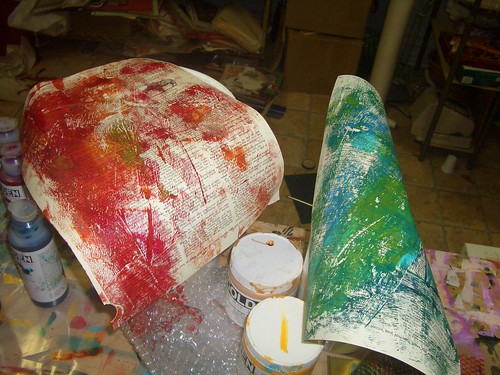
 ...after brayering....
 ....sheets that I used to pick up the excess paint.
Step 5: Now start decorating.
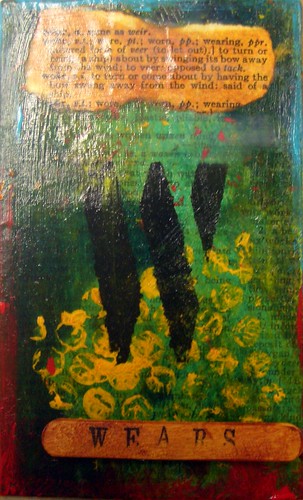
Step 6: Start using your papers! I was using mine to make a skinny:


and the finished project (not a good representation as the soft gel gloss is still wet and the glare from the flash. I added a word with it's definition colored with Quinachridone Gold and a mini popsicle stick also colored with Quin Gold and stamped with a word.

Step1: Gather your paints. I use Golden's Fluid and Heavy Body Acrylic paints.
Step 2: Gather your stencils and other things.
I have a great set of brass stencils I bought as a lot on eBay, there are over 300 pieces. I love using bubble wrap and whatever else I can find that will give me unique markings. I apply the paint with a brayer, it makes such wonderful and deep layers.
Step 3: Gather your papers for a base.
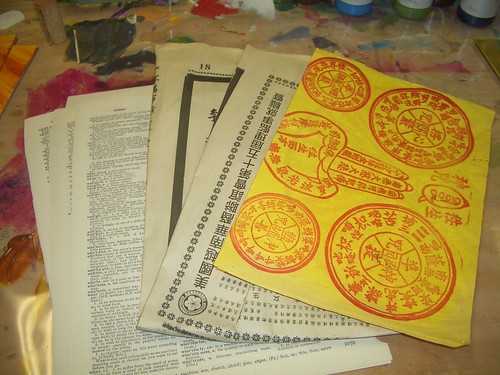
I have all sorts of papers like newspapers, I especially like foreign ones (the one in the photo is an Asian paper I bought in Chinatown in Los Angeles), dictionary pages and some Asian papers I bought in Los Angeles.
Step 4: Layer your paint onto your paper base.

Sometimes I dribble the paint on one at a time brayering in between colors and other times I dribble all the colors on and brayer them all at once. The one thing is that when you dribble it all at once, you tend to get a very thick layer of paint so I will put another piece of paper on top and pull it up and it gives you such cool patterns and a neat base for a second piece. (see example below)
Step 5: Now start decorating.
Step 6: Start using your papers! I was using mine to make a skinny:
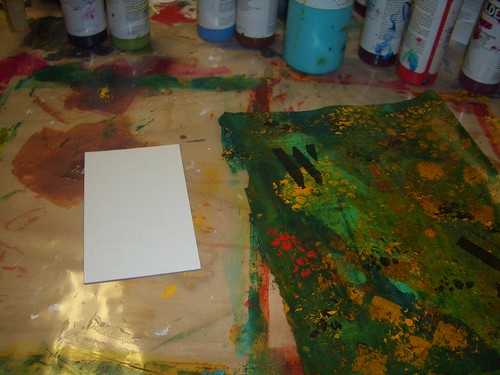

and the finished project (not a good representation as the soft gel gloss is still wet and the glare from the flash. I added a word with it's definition colored with Quinachridone Gold and a mini popsicle stick also colored with Quin Gold and stamped with a word.
Monday, August 2, 2010
Button Bouquet

I am a member of www.swap-bot.com and I like to do swaps that teach me something new. This swap was for a button bouquet. I decided to make mine with "petals".
First I dyed some coffee filters and ironed them flat.
Then I picked out the buttons. You want to layer them so pick different sizes. I decided to layer 3 buttons. I wired them together with copper wire and twisted the tail into a stem.
Then I poked the "stem" through the middle of the coffee filter. I pulled the coffee filter closed about 1 1/2-2 inches below the buttons and then using floral tape wrapped around to secure it.
I tied them altogether with a piece of lace trim.
There you go!
Subscribe to:
Posts (Atom)